How to Draw a Happy Person
MKayo is an artist who specializes in providing simple, easy-to-follow drawing tutorials for beginners.

This drawing tutorial will teach you how to easily draw your own happy faces
Canva
You Can Draw a Smiley Face
This is a tutorial will teach you how to draw a happy face. The steps are as follows:
- Draw a simple circle
- Draw the eyes
- Add the smile
- Add the corners of the mouth
- Enhance the mouth
- Fill in the mouth
Now, let's go into further detail so you can create your very own happy face!
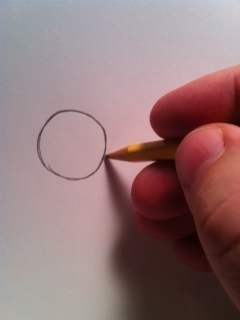
Step 1: Draw a Simple Circle
Like most drawings, this one starts our with a simple shape: a circle.
Drawing a circle is very easy. If you like, you can use a round object to trace around—something like the bottom of a glass or the inside of a masking tape roll.
You will notice that the circle I have drawn is not perfectly round—that's OK. I prefer to draw circles freehand.

Step 2: Draw the Eyes
Once you have your circle drawn, the next step is to add the eyes on your smiley face.
To do this, simply draw some tiny little oval shapes in the upper section of the circle, as shown in the drawing above.

Step 3: Add the Smile
In the lower section of your circle, you're going to draw a slightly curved line, as shown. This line makes up the mouth of your smiley face.
When you have added the mouth, you should have a very recognizable smiley face.
You can stop here or move on to add a few more details.
Scroll to Continue
Read More From Feltmagnet

Step 4: Add the Corners of the Mouth
This step is very simple. You're just going to draw two small, slightly curved lines at each end of the mouth line you just drew.
If you look at the drawing in this step and the previous step, you can see what a difference these tiny lines make to your drawing.

Step 5: Enhance the Mouth
In this step, I have simply added another curved line just below the first curved mouth line.
This adds another level of dimension to the simple smiley face.

Step 6: Fill in the Mouth
For this step, add a small double curved line at the bottom of the mouth as shown. This will be the outline of the tongue and give the mouth a more realistic look.
To fill in the area around the tongue shape, use the edge of your pencil and press down hard.
That's it—you're finished! Very easy, right?

Drawing Tips for Beginners
I couldn't resist drawing some other happy faces. In this scribbling, I have compiled a bunch of happy faces on some of the characters I draw every day.
I want you to know that drawing comes very easy to me now because I have more than 50 years of daily practice and learning under my belt. The best part: I don't have any more drawing ability than you. I just worked very hard at it and developed the ability. You can do this as well. You can learn to draw if you commit to learn and practice daily. Here is a great product to get you started.
I'd love to know how your drawing turned out—won't you leave me a comment below? Also, be sure to take a look at some of my other drawing tutorials listed below. Good luck!
History of the Iconic Happy Face
The creator of the iconic happy face was a man named Harvey Ross Ball, co-owner of a public relations and advertising firm in Massachusetts. Harvey took about 10 minutes to design this classic symbol for an insurance company back in 1964. The smiley face logo was designed to get employees at the insurance company to smile when they filled out forms, answered the phone or paid claims.
Harvey made about $45 (USD) for designing the smiley face. Neither the insurance company nor Harvey and his firm trademarked the now-famous symbol. That $45 would be the only profit Harvey would receive from creating the smiley face.
In September 1970, the phrase "Have a Nice Day" was added by Bernard and Murray Spain. It was at this time that the smiley face caught on and became one of the most recognizable images in the United States. The Spain brothers were in the business of creating fad items. This time, the Spain brothers copyrighted both the smiley face and the "Have a Nice Day" phrase.
It wasn't long before the smiley face caught on and appeared on just about everything from buttons and greeting cards to cookie jars and keychains. Like most fads, this one would only last for a short time. By 1972, the smiley face "fad" was declining. In that year, about 50 million smiley face buttons were produced.
So, there it is—the short and sweet history of the smiley face. Now, let's get on with this tutorial...
Best Pencils for Graphite Artists to Try
A PERSON on April 05, 2018:
Thanks a lot
MKayo (author) from Texas on May 21, 2013:
Thank you, Winder wool! Hope you enjoyed it!
Priyanka Estambale from United States on May 21, 2013:
This brings a smile to my face. Your doodling is simply amazing :)
MKayo (author) from Texas on May 21, 2013:
Sue - I know, right? Yet it was a suggested title. Go figure.
Susan Bailey from South Yorkshire, UK on May 21, 2013:
I think even I can manage the smiley face
naquinthrogerfuns77.blogspot.com
Source: https://feltmagnet.com/drawing/How-to-Draw-a-Happy-Face
0 Response to "How to Draw a Happy Person"
Post a Comment